Sunday, December 11, 2011

Ecofriendly Giftwrapping


As far as I'm concerned, the way a gift is presented is half the beauty of giving or receiving a package.  In past years, I've done traditional wrapping paper with bows and ribbons, but this year I wanted to do something different.  I wanted to use materials I already had instead of buying new rolls of expensive paper.  

I used old, brown paper grocery bags as the wrapping paper.  The plain paper is a great background for beautiful embellishments.  I made delicate tissue paper and fabric rosettes with silver glitter centers -   they were super easy and look gorgeous against the brown paper. 


Instructions:

To make your rosettes, you will need:
Fabric scissors
Tissue paper
Fabric Scraps (tulle and lace would look lovely too)
Glue Gun
Glitter or small beads


Step 1:  Cut small (1-2 inch) circles from the fabric and tissue paper. 
Step 2:  Place a small drop of glue in the center of a tissue paper and pinch the circle together to create folds.


Step 3:  Layer 3-4 circles on top of one another, pinching each one to create folds and gluing it to the next.  
Step 4:  Place a small drop of Elmer's glue in the middle of the flower.  Shake on some glitter, or glue a small bead in the center.


You're done!  Glue or tape flowers to your packages.


Happy crafting!.love.Rachel

Saturday, November 26, 2011

Local is the New Black

Spend your dollars wisely.  Skip the lines at Walmart and Best Buy, and shop at small businesses in your community instead.  Our family has never been big on Black Friday shopping, but this year, we decided to head to downtown Asheville for some serious shopping.  Asheville has its own campaign to promote local, independent businesses called


Today on Asheville Grown's facebook page, I saw this breakdown of where your dollars go when you shop at a local business versus a chain.  I like the idea of thinking local first - I definitely shop at chain stores and with online retailers, but I try to shop locally when I can.


credit


With this spirit of local shopping in mind, we headed to downtown Asheville.  We ended up only making it up and down Lexington, and it took us about two and a half hours with a brief stop for some delicious Indian fare at Mela - recommended by the New York Times and voted best Indian restaurant in Western North Carolina 6 years running.


I picked up all sorts of things, including some new sunglasses at Hip Replacements.
...and how lovely is this coat (also from Hip Replacements) - she reminds me of a modernized Red Riding Hood.

I picked up several goodies at Virtue, including a handknitted head wrap, knit leggings, a basic long sleeve shirt, and a hot pink flutter dress (also available in teal and black).  They had some great sales going on, and the store was packed.  


warm knit leggings from Virtue $12.95

Knitted Flower Head Wrap from Virtue $10.36 (on sale)

I found this burgandy faux leather bag from a thrift store for $6 (on sale).  It's the perfect size for my MacBook.  It came from ReinVintage in the Biltmore Square Mall.  
Thrifted Faux Leather Bag $6

We also found a big barrel full of head scarves for $3 each at Instant Karma on Lexington.  Lovely!


In honor of Small Business Saturday,  we're offering a coupon code to our site, ajoeynamedroo.  Use code SMBIZDAYYAY for 15% off your entire order!  As you can see, the money will go right back into our community.  Happy shopping!

.love.
Rachel


Saturday, July 23, 2011

Home Renovations: The Bedroom

I recently moved into a new house and I've done A LOT of renovations.  I'm going to start my renovation recap with one of the bedrooms.  I was inspired by an etsy treasury I created sometime last year that featured carnival colors and circus staples.  For my color palette, I wanted to go with the bright pastels you see on carnival rides:  sea green, hot pink and baby pink, and pale yellow.
To recreate the theme, I used a base coat of Valspar's Mermaid's Song, and created a trim in Valspar's Hot Passion Pink.  The trim was easy and relatively mess free.  I think it took me about two hours to complete the entire border.  I chose a damask pattern I found at Michael's.  My only complaint is that once I saw it on the walls, I wanted to paint it everywhere.  Once I find a crafty idea I like, I sprint with it!

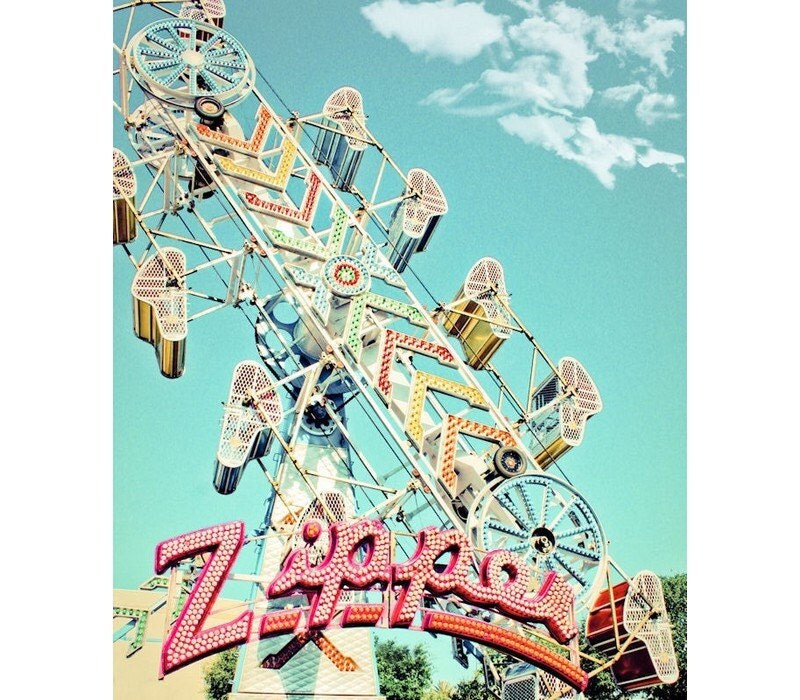
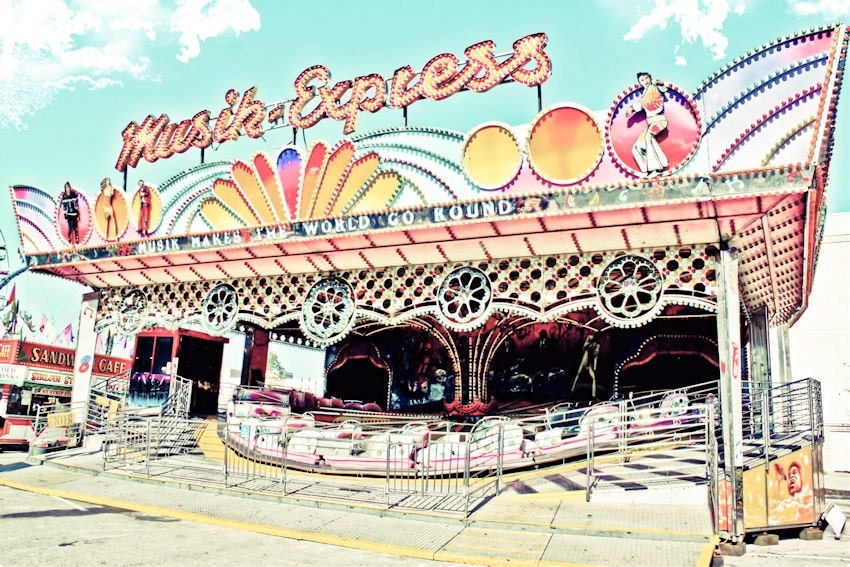
I wanted something really cool for the walls, and I found an etsy seller that matched my aesthetic perfectly.  Eyeshuttertoforget sells amazing vintage-inspired prints that are beautiful, whimsical, calming, and nostalgic, all at the same time.  I love the subject and the colors.


I wanted the prints to make a statement, so I chose three 16x20 photographs.  Deciding which three I wanted was so difficult; there are so many fabulous prints to choose from!  I finally decided on the three above.  I bought silver poster frames on sale at Michael's, and I used hot pink spray paint on plain cardboard to make the mat. 


I absolutely adore all the prints.  They arrived super quickly and in perfect condition.  The seller even sent along a little 5x7 freebie of a merry-go-round horse.  I love everything from this shop and I definitely want to get more photographs.  

I added a fun and sparkly vase with glittered flowers to complement the pictures.  The vase is an empty wine bottle from World Market, and the flowers are from Michael's - I edged the them in glue and sprinkled them with glitter. 
 
Also complementing the theme are pieces of hard candy made from glass that I inherited from my grandma.  The cabinet is my most prized possession - my amazingly talented significant other made it for me for Valentine's Day a couple of years ago.  

He designed and constructed the entire piece completely by hand.  I am encouraging him to do some pieces for his etsy shop WhiskeyBent; right now he sells hand-tooled leather flasks that he literally cannot keep in stock.  I also made my own decoupaged light switch plates to match the decor.  Tutorial coming in the next post! (Yeah, I know - he can make an entire piece of furniture from scratch and I can decoupage...life is so not fair).  


.Love.
Rachel

Sunday, July 17, 2011

Cupcakes!

I have never had a cupcake better than those from Vegan Cupcakes Take Over the World.  I'm serious - not only will your cupcakes be beautifully party-ready, as soon as anyone takes a bite, all you will hear is "mmmmhmmm."  I took the Coconut Lime Cupcakes (pg. 107) to a faculty luncheon at my school, and everyone went crazy for them.  The best thing about this book is that the cupcakes are made to impress in both design and flavor.  This is probably my #1 favorite cookbook, and it should be a staple on every dessert-lover's shelf.

The recipes are simple and delicious.  Many of the recipes use similar ingredients, so once you purchase those staples, you're good to go for a variety of different recipes.  Admittedly, some of the ingredients are not going to be in your pantry to begin with, but I've had no trouble finding them at Earth Fare.  If you've got a health food store in your area, you're golden, but even if you don't, many of the odder ingredients can be substituted for something else.    

These were the among the first cupcakes I made from the book.  To the left are Gingerbread Cupcakes with Lemony Frosting.  I used the Lemony Buttercream frosting and added a bit of lemon zest for decoration.  They were soooo good - spicy and sweet, perfect for the holidays.  To the right are the Maple Cupcakes with Creamy Maple Frosting and Sugared Walnuts.  I loved the nutty flavor combined with the maple, but the frosting was not my favorite.  Other people loved it, but I thought the soy milk powder gave it an odd flavor and a downright icky texture.  If I were to do them again, I would use the simple buttercream recipe and add a dollop of maple syrup to that recipe.  On the plus side, the sugared walnuts were so good, my family ate half of them before they even made it on the cupcakes!


I turned to this book again when I was put in charge of my friend's bridal shower.  To the left is my favorite so far - the Mucho Margarita Cupcake.  I did them in a hurry, so they look a mess,  but they were amazing.  Something about the salt in the icing just works with the sweetness of the cupcake and the flavor of the tequila; plus, they've got just the right amount of novelty for Cinco de Mayo or a 21st birthday party.  I especially love the colorful rim of sugar around the edge!  I also made Green Tea Cupcakes with Green Tea Glaze and Almond Flowers (on the right).  They looked so lovely, especially for a bridal shower, but the flavor was so-so.  Part of that was my fault - the recipe called for matcha green tea powder, which I couldn't find anywhere, so I used regular green tea powder instead.  Big mistake.  The cupcakes turned golden brown instead of light green, and they tasted like fake sweetener.  I wouldn't recommend this recipe because the ingredients are a pain to find, and it calls for a lot of things most people don't have in the pantry and will never use again (I'm looking at you, $6 tube of vegan marzipan!).

Another of my favorites is the Crimson Velvet Cupcakes with Vegan Cream Cheese Frosting.  Here is my recipe (adapted from Vegan Cupcakes Take Over the World):


Cupcakes:
1 C Almond Milk
1 tsp apple cider vinegar
1 3/4 C whole wheat flour
1 C sugar
1 tbs cocoa powder
1/2 tsp baking powder
1/2 tsp baking soda
1/2 tsp salt
1/3 C canola oil
1 tbs red food coloring (make sure it does not contain carmine)
1/2 tsp vanilla extract
1 tsp almond extract
1 tsp Chocolate Almondine flavor (or similar chocolate flavoring)


1.  Preheat oven to 350 degrees and line your muffin tin.
2. Mix the almond milk and vinegar in a medium bowl - you'll use this later.
3.  Combine the dry ingredients in a large mixing bowl.
4.  Add the rest of the wet ingredients to the almond milk concoction.
5.  Add the wet ingredients to the dry, mixing well.  Add more food coloring if necessary, though I don't care for an overly red cake.
6.  Pour batter into cupcake liners and bake 20-22 minutes, depending on your oven.  They took 22 minutes in mine.  Cool completely.


Frosting: 
1/4 C Earth Balance
1/2 C Follow Your Heart Vegan Gourmet Cream Cheese
2 1/2 C Powdered Sugar
1 tsp Vanilla extract


1.  Combine all ingredients using a mixer.  Make sure the Earth Balance and cream cheese are at room temperature before mixing.
2.  Place frosting in the refrigerator to cool.
3.  Pipe onto cupcakes.

Enjoy!
.Love.
Rachel

Wednesday, June 8, 2011

Feature Fest

The kiva team over at etsy is having a feature fest to spread the word about all of our wonderful members.  

All of the members of the kiva team loan at kiva.org, a microlending site where anyone can make a small loan to an entrepreneur anywhere in the world.  Those small (starting at $25) loans make a huge difference in the lives of the business owner, their families, and their communities!

I decided to feature thesquarepeg, partly because I love her name and her fun and whimsical picture!

I wanted to get to know her better, and I thought you would too!  Thesquarepeg is Cathi Newlin, an artist experienced and trained in a variety of media, who is now using her talents to produce lovely Japanese inspired ceramic pieces.  Her art has been a developing process in technique and style.  

I can honestly say that my ceramic work is only now being informed by my 2 dimensional training. I spent so much time trying for that perfectly thrown, utterly symmetric bowl, that I was very tight and narrowly focused.
Now, I'm comfortable enough with my skills, and influenced by other potters' work enough to bring some looseness and fluidity into my clay - its becoming less like rendering and more like life drawing at a big ol' easel.


Her functional pieces have a lovely calming and natural aesthetic, with muted colors and organic shapes.  Any kitchen lucky enough to have one of Cathi's pieces gains a tranquil and creative addition.  Cathi hopes that her pieces become integrated into people's everyday lives.

I hope my customers get from my pieces something that they *want* to use well and often. I love fine art, and its in my blood, but the thought of someone using one of my pieces as an everyday item - as part of their every day life, well, holy cow that's awesome!

Cathi is very thankful to everyone who has appreciated her art and supported thesquarepeg
First, to anyone who's ever plopped down hard-earned cash for something I made, thank you. I'm still amazed every time someone does that!

If you decide to plop down that hard-earned cash at the squarepeg, know that Cathi supports 2 wonderful causes.  First, kiva.org 

As we ask every member of the kiva team, why do you loan?
I'm a fortunate soul - I'm a white woman born and raised in the richest nation on Earth. I have the luxury to own pets, call my art my vocation, read a book and watch my children grow old. Kiva is, in my opinion, the best way for me to be an active part of a global village. EVERYONE should be able to feed and educate their children. The world becomes a better place for everyone when there is less poverty, more education and stronger communities.
And since I'm not wealthy by any means, Kiva is the best bang for the buck ;)

Cathi also supports another cause that you know we love, dog rescue!  
my other conviction - purebred dog rescue. I've been active in Boxer rescue for more than 15 years.
You see a few items in my pottery shop from which money is donated to the cause, and in my photography shop (theSquarePegToo), 20% of all sales are donated.
And no matter what your pet, you can help the cause too just by neutering your pet.

Two wonderful causes, from a great talent.  You can purchase ceramic pieces from Cathi at thesquarepeg

Sunday, May 8, 2011

Handmade Laundry Detergent

I hate buying laundry detergent because it's incredibly expensive, especially if you get the good stuff without the nasty ingredients and fragrances.  I've been playing around with the idea of making my own detergent, and I finally took the plunge.  It's actually quite simply and amazingly cost effective.  There are only three ingredients - Arm & Hammer Super Washing Soda, Borax, and soap.  I used my own unscented cold process soap I made back in January.  Even if you have to buy the soap, your total cost could be around $8, and this makes a lot of detergent: I would estimate about 100 loads.  Plus, you'll have tons of washing soda and borax left over for your next batch.


Ingredients:  
1 cup Arm&Hammer Washing Soda $2.50/3.9 lbs
1 cup Borax $3/4.75 lbs
2 cups Cold Process Soap* $2.50/~4.5oz
1 tsp Essential oil or fragrance oil (optional)

*When choosing your cold process soap, make sure it's vegan and doesn't contain tallow or lard.  You don't need conditioning oils, so look instead for cleansing oils like coconut oil and palm kernel oil.  

Step 1:  Grate your cold process soap.  I used the medium grade so that the soap didn't get stuck in the tinier grates.
Go ahead and use up the whole bar.  You should have approximately 2 packed cups - if the measurement varies a little bit, that's okay.

Step 2:  Add the curly, grated soap bits of soap to a food processor.  
I don't think this step is completely necessary, but it will ensure that the soap dissolves easily in your washing machine.  It does turn the soap into smaller bits that mix better with your other ingredients.  I also added a bit of the washing soda so that the soap wouldn't stick together as it was getting shredded.

Step 3:  Mix your 2 cups soap bits with 1 cup of A&H Super Washing Soda and 1 cup Borax.  If you would like to add fragrance, add 1 tsp essential oil or fragrance oil by droplets to the mixture.  I recommend mixing in a large, lidded container.  I used a 1 gallon container with a snap top.  All you have to do is shake it to mix.  If you don't have something similar, you can always stir the ingredients in a large bowl. 


Step 4:  You're done! Use 2-3 tablespoons per load.  I've also heard you can use vinegar in the rinse cycle as a fabric softener, but I've never tried it.  Let me know how your detergent works, if you have a different recipe, or if you've got other laundry tips to share : )  Enjoy!


Rachel

Wednesday, May 4, 2011

Giveaway Winner!

Our giveaway ended Monday, and the winner is Chandler, commenter #33.  Chandler was picked using a random number generator.

Chandler has won her choice of yummy treats from ajoeynamedroo.  Thank you to everyone who entered; we truly appreciate all your support.  Stay tuned for more giveaways and tutorials, and in the meantime.....


.Love.
Rachel
 

Friday, April 22, 2011

Earth Day Tomato Tutorial

Happy Earth Day!  To celebrate, I planted my tomato seeds.  I know it's really late to start them inside, but ya know, sometimes life gets in the way.  Anyway, I decided to try upside down tomato planting this year.

Last year, we planted heirloom tomatoes and they looked gorgeous until late June, then they got a nasty late blight, which I've heard is getting worse along the east coast.  The leaves turned yellow and fell off, and by fall, most of the plants were dead.  We tried Serenade, an organic fungicide, but it didn't seem to help.  The cucumbers and watermelons didn't fare so well either.

Anyway, it was my hope that by planting this year's tomatoes far away from the garden and in the air, maybe they wouldn't get the blight.  After all, summer isn't summer without tomatoes!

To be frank, I couldn't really afford a topsy turvy.  Plus, the reviews on amazon are actually quite horrible. Instead, I made my own upside down planter from a regular old pot.  After I finished planting the seeds, I realized I should have just turned it right side up and had tomato hanging baskets, but I was trying to mimic the upside down topsy turvy.  

1.  First, I found two old planters.  They already had holes in the bottom, but I cut them with scissors and made them a bit larger.


2.  Next, I flipped them upside down and filled them to the top with potting soil.  It's a good idea to leave about a 1/2" of free space at the top.


3.  I covered the planter with a scrap piece of wood.  It's not exactly pretty, but it works.  Once I had the wood on the top of the planter, I flipped the pot back over.


4.  Lastly, I planted the seeds in the top of the container.  I sprinkled about 5 seeds in each hole, covered them with dirt, and lightly packed them down.  Later I'll see which seedlings start out the strongest and pull the others out.


5.  And we've got a taker!  The first little seedling makes an appearance.  Some of the other seeds are starting to sprout too.  Once the plants get around 5"-10" high, I'll flip the planter over so that the plants are growing upside down.  I'll use the hooks from a hanging basket to hang the planter on my porch.


6.  I started some more seeds inside.  I'll probably transplant some to the ground, and the others into planters.  I hope to also have a few tomato plants in hanging baskets (the right way up, not upside down!).


I really hope some of these tomato plants produce.  I'll update this post as the plants progress.  In conclusion, happy Earth Day!  Go plant something!

: )
Rachel

Thursday, April 21, 2011

Spring Giveaway!


Spring breaaaaaaaak! One of the perks of teaching is that you do get a (much much much needed) break from the kiddies. The week leading up to vacation was incredibly long: Wednesday felt like Friday, Thursday felt like I wasn't going to make it, and Friday was numbness from such a long week. And then there was nothing but relaxation (finally!). Having a break from teaching school has given me time to think about what's going on at ajoeynamedroo. I am going to be phasing out some of the more "wintery" products, as well as those that don't get as much love, in favor of brighter, more spring appropriate picks like the Lemon Meringue Pie Body Butter.

Many of the balms in the black recycled tubes will be going on sale. They are especially wonderful for boys with chapped lips; toting around a manly black lip balm tube is very cool, trust me. My favorite of these flavors is definitely the Root Beer balm. I'm also thinking of discontinuing the Wild Mint & Ivy scented scrubs. I love the fragrance, but it doesn't sell as well as some of the other scrubs, most notably the Strawberry Shortcake and the Cafe Mocha scrub. Between these two, Strawberry Shortcake is my favorite (though I did read somewhere that coffee can help reduce cellulite. I don't know if it's true, but it smells great anyway!).

So - things to look forward to. I'm going to start making VEGAN pigmented balms using mica. You've got to watch out for colored lip products: many of them contain carmine, a pigment made of crushed up beetles. Yuck! Anyway, mine will of course be free of all animal product, including beetle bodies. I'm also going to add watermelon to my lip balm flavors. I've also got all the ingredients for a lemon poppyseed sugar scrub. It's going to have real poppyseeds in it for exfoliation, in addition to the sugar. I'm a little obsessed with lemon fragrance right now - I think it's the weather. Until the scrub is ready, you can always grab the deliciously scented Lemon Sugar cuticle cream. It's one of my favorites.

And that brings us to the giveaway! To celebrate new beginnings and new products, you can enter to win a $20 gift certificate to ajoeynamedroo.  You may leave a separate comment for each entry.  Please make sure we have a way of getting in contact with you if you're the winner.

1. Mandatory entry: follow our blog and leave a comment telling us your favorite item from ajoeynamedroo.

Additional entries:
2. Fan us on
Facebook
3. Follow us on
twitter

4. Tweet about this giveaway and mention @ajoeynamedroo for one entry
5. Post about this giveaway on your blog and link back to it here
6. Heart
ajoeynamedroo on etsy
7. Comment on any of the other posts on this blog, then come back here and tell us which one.

The contest is open internationally and will end May 2nd.  We will choose the winner via random.org.  Thank you for supporting ajoeynamedroo.
While our giveaway is active, you can also use the coupon code SPRINGCLEAN for a whopping 20% off everything at ajoeynamedroo. Happy shopping!

Monday, April 18, 2011

The Evolution of the Shoe

In a recent issue of The New Yorker, there is a 9 page spread on the fabulous fashion mind Christian Louboutin, titled “Christian Louboutin and the Psychology of Shoes.”

I actually didn’t make it through all 9 pages because frankly, I was perturbed that there were NINE pages of teeny tiny New Yorker font and only ONE (yes, ONE) photograph of Louboutin’s work. Hello, New Yorker – people who are actually going to sit down and read about a shoe designer want to see some dang shoes. Really.

Anyway, the article got me thinking about my own shoe obsession. I dislike talking about it because it makes me seem so stereotypically female, but what the heck, I like shoes, and I’ve always liked shoes. I’ve recently embraced my proclivity toward shoes, because frankly, fashion is art, and art is an acceptable way to spend money; plus, I’m not being imprudent, I’m helping to stimulate the economy!

Here’s a brief look at my personal evolution in shoe shopping

Elementary school: Keds. With bows. That is all. Use Etsy to find customized Keds for your little fashionista.
Etsy seller AsaGleek provides a hip take on traditional Keds that will make your kid a rockstar.

Middle school: I would have died and gone to heaven if I could have rocked these cutesy-yet-punk-rock flats while jamming out to Bikini Kill and Hole on my purple glitter CD player with matching headphones.
Adorable zombie kitty flats by Etsy seller emandsprout


College: defined by THE COWBOY BOOT. At one point, I had 16 pairs of cowboy boots. I maintain that I was wearing them before the hipsters were (at least before the local hipsters). I got my first pair from a thrift store for $14; I’m fairly certain that was the most I ever paid. Last winter I gave away almost all of my cowboy boots. Even though I purchased them all used, I began to feel more and more uncomfortable with wearing leather, so I kept the two pairs made from manmade materials and gave the others away. Who knows - maybe someone will find a pair of my boots at Goodwill and purchase those instead of a new pair!
Reduce and reuse with these cherry red and gray vintage boots from etsy seller PacificWonderland


Post-college: the teacher shoe. At first I was scornful and claimed to only wear them for comfort, and then the unthinkable happened: I started to like them. I soon learned that you can be chic and comfortable.
Etsy seller HydraHeart has tons of hip, stylish, and comfy handmade flats. I like the red Mary Janes. They're vegan!


Wearing flats all day led me to a personal backlash at night; the more glamourous the shoe, the better! I would die and go to heaven if these lovelies found a spot in my closet.
The Ebony Glitter heels are just one pair out of many beyond-amazing painted pumps by TaylorSays.


Now: I still wear teacher shoes; off duty, my heels keep getting higher and higher. I recently signed up for a really affordable shoe club with a fantastically trendy selection in the hopes of keeping my shoe wardrobe fresh. The shoes are $49.95, but there's almost always a $10 off coupon code, plus there's free shipping. You can use the code Spring10 until April 30th for $10 off. I also love that most of the shoes use manmade materials, including the Yvettes.
The Yvette from Sole Society.


What’s your favorite pair of shoes, and how has your style changed over time?

<3 Rachel