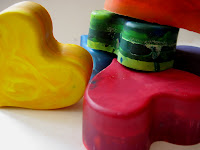
My sister Rachel made these cute crayons for our nephew Jackson. He'll have to wait a little while to use them, he's only 3 almost 4 months old right now. I'm so excited to see what he'll draw with them in just a short time!
She was nice enough to make a little tutorial for the blog, and send me these awesome pics. Enjoy!
Materials:
Newspaper
Old crayons in a variety of colors
Glitter (optional)
Silicone baking mold (oven safe)
Heat gun or double boiler (I don’t recommend the microwave. It takes way too long to heat up the crayons, and you don’t have as much control over combining your colors).
2. Lay out a newspaper over your work service.
Choose a mold for your crayons. The younger your intended user, the bigger your rebatched fat crayons need to be. Choose big molds for very young children, and smaller molds for older children.
The absolute best molds are those trendy silicone molds than you can bend. You can get them really hot, but they don’t hold the heat for long (which means no burned fingers). It’s also really easy to pop out the finished crayons when they are ready. You can often find them in the Target dollar bins (as ice cube trays), and I know they carry a wide selection at Michael’s.
3. Amass a collection of old, broken, yucky crayons.
We certainly have plenty of these from our childhood; an entire pink bucket full. We loved our crayons!
4. Separate the crayons into color-coordinated groups. Each group will make one fat crayon. I chose to do the primary (red, blue, and yellow) and secondary (purple, orange, green) colors, plus brown. Make sure you include a variety of shades in each group. For example, in my group of red, I included brick red, red, pale pink, maroon, and fuchsia. This will give you pretty swirls when you melt the crayons down.
 5. Peel a skinny vertical strip of paper off the length of each crayon, then remove the whole sheet of paper in one fell swoop.
 Can't you tell Rachel's an English teacher? "One fell swoop," so beautifully descriptive!
6. The number of crayons you need for each rebatched fat crayon will vary. My molds were approximately 1 inch deep and 2 inches wide. I used 10-12 crayons for each mold.
7. Chose a couple of darker shades in one of your groups. Place them in the bottom of your mold, aim your heat gun at them, and fire. Use a low setting, and do not touch the mold, it can get hot.
 Once they are melted, throw in the lighter shade. Try not to mix the colors too much because you want a pretty swirly pattern. To make sure I did this, I held the lighter crayon in my hand and aimed the heat gun at just the end. That way the crayon dripped softly into the mold.
 * If you do it this way, make sure to keep a safe distance between your hand and the blast of heat. Heat guns WILL burn you!*
Once both colors are in the mold, they will mix naturally, but you can use a toothpick to swirl them as well.
8. Cool.
9. When the rebatched crayons have hardened, use your heat gun to melt the topmost layer of the wax. Throw in a couple more crayons in different shades and melt. Feel free to throw in different colors of glitter into the hot wax. You can also add white, silver, or gold to your color groups.

10. Cool. Repeat process until mold is full.
11. When your rebatched crayons are completely cool, pop them out of the mold and you’re done!
Hope you enjoyed the tutorial for today. Rachel said that it involved quite a bit of trial and error involving microwaves and including multiple fire alarms! We hope this tutorial will make creating your own crayons easy for you without all the drama. Time to make beautiful crayons of your own!


6 comments:
Oh my gosh, I LOVE these! Thank you for sharing. ~Sam
AWESOME idea!
Definetly will give it a go when I can!
This is the best tuorial I've seen yet for making chunky crayons. Thanks!
Soooo coool! Id like to make some for my little niece. Thanks for sharing these!
These are so much fun to make! I suggest only using Crayola crayons though -- cheaper crayons leave a layer of wax on the outside of the new chunky crayon and they don't color very well! And if you don't have a heat gun, you can do them in the oven too!
That's cool that the oven works too! I'm glad you all enjoyed the tutorial. Good luck with your fat crayon endeavors!
Post a Comment